In this article
- What is the best MacBook for music production?
- MacBook Pro M1 vs MacBook Air M1
- Comparisons between the latest models
- Recommendations based on budget
- What are the features of Apple Music on MacBook?
- Music Library
- Lyric syncing
- Access to music libraries across multiple devices
- How do you use Apple Music on MacBook?
- Step-by-step guides
- Playlist customisation
- Syncing with other Apple devices
- How do you download music from YouTube to MacBook?
- Recommended software for downloading music
- Steps to download and organise music
- Tools for managing downloaded music
- What is the best music production software for MacBook?
- Main software available
- Feature comparison
- Usage tips for beginners
- How do you organise a music library on MacBook?
- Creating playlists
- Using tags and metadata
- Syncing and backing up music
- Conclusion
- Read also
- Best MacBook for music production: MacBook Pro M1 is ideal for demanding performance; Air M1 can overheat with intensive use.
- M2 models: Pro M2 and Air M2 offer memory and processing improvements, but are more expensive.
- Budget: Air M1 is good for beginners; Pro M1 or M2 is better for those who can invest more.
- Apple Music on MacBook: Lyric syncing, access to your library across multiple devices, easy creation of libraries and playlists.
- Downloading music from YouTube: Use software such as 4K Video Downloader; organise by folders and use Apple Music or VLC to manage it.
- Music production software: Logic Pro for professionals, Ableton Live for live performances, GarageBand for beginners.
- Music organisation on MacBook: Create playlists, use tags/metadata, sync and back up with iCloud.
Are you thinking of turning your MacBook into a portable studio for music production? I understand how important it is to choose the right model for your workflow. In this post, we will explore the best MacBooks for music production and help you decide: MacBook Pro or MacBook Air? Stay tuned!
What is the best MacBook for music production?
Choosing a MacBook for music production depends on several factors. Let’s take a closer look.MacBook Pro M1 vs MacBook Air M1
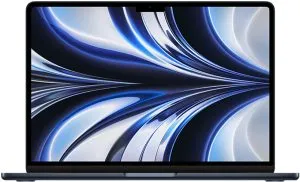
The main difference between the MacBook Pro M1 and the MacBook Air M1 is performance. The MacBook Pro M1 has an internal fan to prevent overheating, so it can handle heavier workloads, which is common in music production. The MacBook Air M1, being fanless, can heat up when used intensively, affecting work efficiency. If you are asking about the best one for music production: the MacBook Pro M1. It offers solid performance even in demanding tasks such as real-time audio editing. But which one should you choose? If your budget allows and you need maximum performance, the Pro is ideal. If you need something more portable and your work is light, go with the Air.Comparisons between the latest models
New models, the M2 range, have recently been launched. Both the MacBook Pro M2 and MacBook Air M2 offer significant improvements. In the MacBook Pro M2, memory and processing capacity have increased. If you value maximum quality and time is a crucial factor, then the new M2 models will be an excellent choice. But remember, the price is much higher compared with the M1 models.Recommendations based on budget
For a limited budget, the MacBook Air M1 is a good starting point, especially for beginners. It can run basic music production software without any issues. For those with a more flexible budget, investing in the MacBook Pro M1 or M2 is worth it. Both extend the useful life of your equipment, avoiding short-term upgrades. Want to know more about which MacBook to choose for music production? See this article. It compares each model in detail, helping with your decision. Remember, choosing the best MacBook depends on your specific production needs.What are the features of Apple Music on MacBook?
Music Library
Apple Music on MacBook lets you create a personalised music library. With just one click, you can add several songs and albums. In addition, the library is organised intuitively. I love how the app keeps everything in place. It is easy to find your favourite tracks. You can even import old songs from iTunes. For more details, see Apple’s guide to Apple Music.Lyric syncing
One of the coolest features is lyric syncing. When you play a song, the lyrics appear on screen for you to follow along. This is great for karaoke at home. In addition, you can add your own lyrics if the song does not have them. This feature makes the experience much more interactive and fun.Access to music libraries across multiple devices
With Apple Music, you can access your music library on any device. How about listening to that special playlist on your iPhone, Apple Watch or HomePod? No problem! Your music is always with you, wherever you are. This seamless syncing between devices is one of the biggest advantages of Apple Music. It is like carrying a jukebox in your pocket. These features make Apple Music on MacBook an excellent choice for any music lover. If you like exploring new music or need a well-organised library, this service is for you. Try exploring all these features and see how they can improve your everyday music experience.How do you use Apple Music on MacBook?
Step-by-step guides
Using Apple Music on MacBook is simple. First, open the Music app on your MacBook. Sign in with your Apple ID. Explore millions of songs and albums. Click "Listen Now" for recommendations. You can also search for specific tracks. Click the "+" symbol to add a song to your library.Playlist customisation
Creating personalised playlists in Apple Music is fun. Click "File" and then "New Playlist". Drag songs or albums into the playlist. Give it a unique name that reflects the style or mood of the selection. You can edit the order of the songs, remove them or add new ones. Tap the playlist to play your favourite songs continuously.Syncing with other Apple devices
Syncing Apple Music with other Apple devices is very useful. On your MacBook, go to "System Preferences". Click "Apple ID" and then "iCloud". Make sure the "Music" option is enabled. Now, your playlists and albums will be available on iPhone, iPad and even Apple Watch. With SharePlay, you can listen to music during a FaceTime call. Just start a call, tap "Music" and select a track to listen to together.How do you download music from YouTube to MacBook?
Recommended software for downloading music
To begin, you need reliable software. I like 4K Video Downloader. It is simple and straightforward. Other good programs include YTD Video Downloader and ClipGrab. These apps let you download videos and convert the audio to MP3. Just choose the one you think is best.Steps to download and organise music
First, open your browser and go to YouTube. Find the video for the song you want to download. Copy the video link. Then, open your chosen download software. Paste the video link into the input bar. Select "Download" and wait. Once finished, the file will be in your downloads folder or wherever you choose to save it. To organise your music, use folders. Create folders by genre, artist or album. Use clear and standardised names. This will make it easier to find the music you want later.Tools for managing downloaded music
After downloading and organising, you need tools to manage your music. I recommend Apple Music. Apple Music syncs your library across all Apple devices. Another good piece of software is VLC Media Player. It is great for playing different audio formats. In addition, programs such as MediaMonkey and MusicBee are useful. They help with sorting and tagging songs, keeping everything well organised. After all, there is no point downloading if you cannot find it afterwards. I hope these tips help you download and organise your music on MacBook. Good luck!What is the best music production software for MacBook?
To define the best music production software for MacBook, we first look at the main programs available. Let’s explore the best apps and how to set them up to produce music on your Mac.Main software available
The most popular programs for music production on MacBook are Logic Pro, Ableton Live and GarageBand. Logic Pro is from Apple and has an intuitive interface. It is ideal for those already familiar with music. Ableton Live is excellent for live performances and mixing. GarageBand is perfect for beginners with its easy use and basic tools.Feature comparison
Each piece of software has its own features that make it unique. Logic Pro has a vast library of sounds and plugins. It allows multi-track recording and detailed editing. Ableton Live is known for its powerful set of tools for live performances and MIDI clips. Its interface simplifies the creation of quick loops. GarageBand offers a simple and straightforward interface. It lets you create music with different virtual instruments and predefined loops. Ideal for those just starting out.Usage tips for beginners
For beginners, my recommendation is to start with GarageBand. Set up your workspace by choosing a basic project. Use loops and virtual instruments to familiarise yourself with the interface. As you feel more comfortable, explore the available plugins and effects. If you want something more advanced, move to Logic Pro or Ableton Live. Both have built-in tutorials to help you learn the various functions. This section shows what you need to start music production on MacBook. Whether you are a beginner or advanced, there is software that will meet your needs. Explore each option and choose the one that best suits your production style.How do you organise a music library on MacBook?
Organising your music library on MacBook may seem difficult, but it does not have to be. The secret is using the right tools and a few tricks. Let’s explore three main steps: creating playlists, using tags and metadata, and syncing and backing up your collection.Creating playlists
Creating playlists helps keep your music in order. To start, open the Apple Music app on your MacBook. Click "File", then "New Playlist". Give it a name and that’s it! You can drag and drop songs into the new playlist. This makes it easier to listen to your favourite songs without the clutter.Using tags and metadata
Tags and metadata are extra information you add to your songs. They help organise everything. In Apple Music, right-click the song and select "Information". Here, you can add the artist name, genre and even the song lyrics. Doing this may seem tedious at first, but it will save a lot of time later. With tags, it is easy to find any song.Syncing and backing up music
Syncing and backing up your music is very important. Use iCloud for this. In Apple Music, go to "Menu > Account > Enable iCloud Music Library". Now, your music is safe and available on all your devices. Remember to back up regularly. That way, you do not lose anything if something goes wrong. These three steps will transform the way you organise your music on MacBook. Creating playlists makes everything accessible. Tags and metadata make searching easier. Syncing and backing up keeps everything safe. With these tips, your music library will be spotless in no time.Conclusion
Choosing the right MacBook for music production is vital. The comparison between the MacBook Pro M1 and the MacBook Air M1 shows which models stand out. I talked about the features of Apple Music and how to use it on MacBook. I also explained how to download music from YouTube and organised suggestions for music production software. In the end, taking good care of your music library on MacBook makes all the difference. Remember: the perfect MacBook and the right tools greatly improve your music experience.Read also
- MACBOOK AIR, PRO OR IMAC: which Apple computer is right for me?
- Should I buy a desktop? Discover the advantages and disadvantages of iMac!
- Which MacBook to buy in 2023
- See refurbished MacBooks at iOutlet
Get more articles like this one.
Refurbished tech analysis + €5 with BEMVINDO5 on your first order.
Looking for a refurbished MacBook?
Tested and certified MacBooks with a 24-month warranty. From MacBook Air to MacBook Pro.
24-month warrantyShipping up to 8 business days
See MacBooks →